Patient Portal Guide
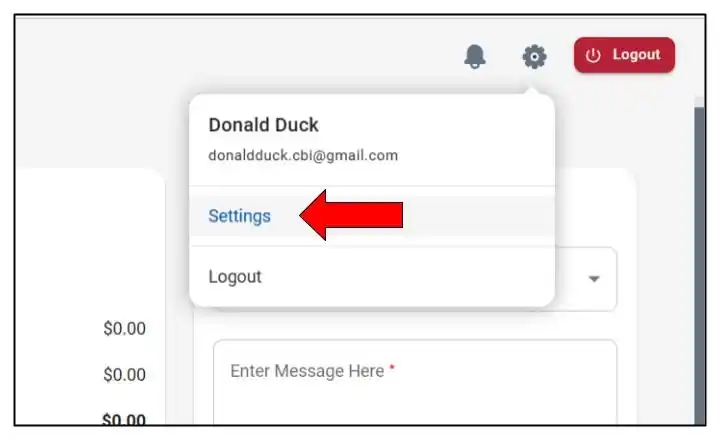
1. From the home screen, press the cog (gear-shaped symbol) in top right corner
2. Click settings
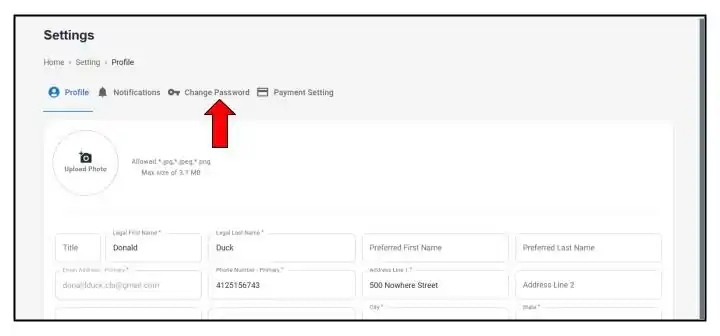
3. Select change password
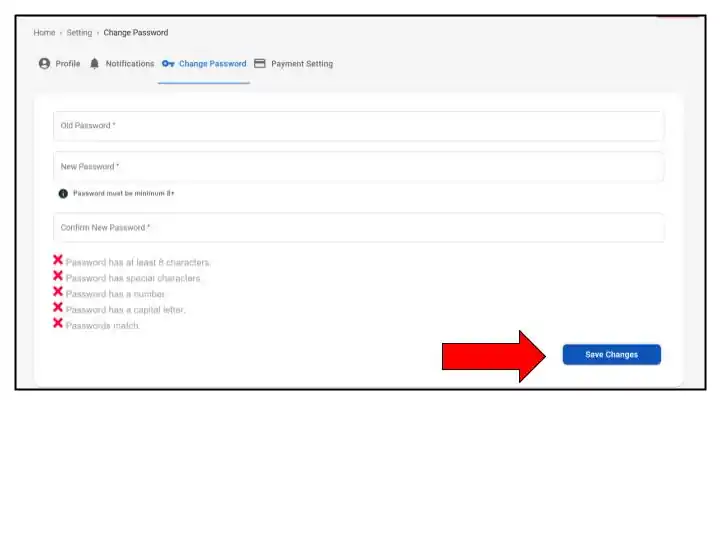
4. Type in your old password and your new password and click save
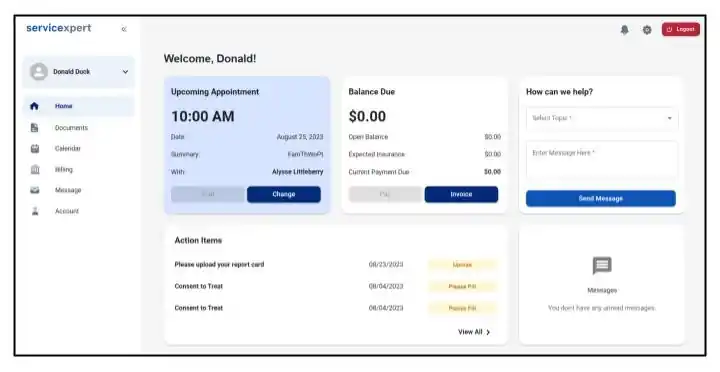
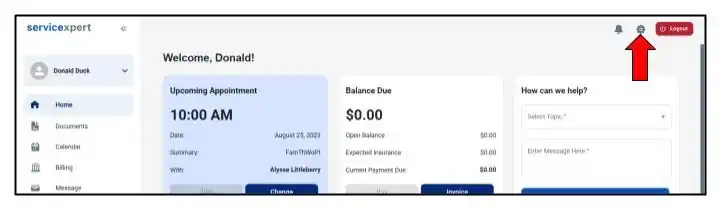
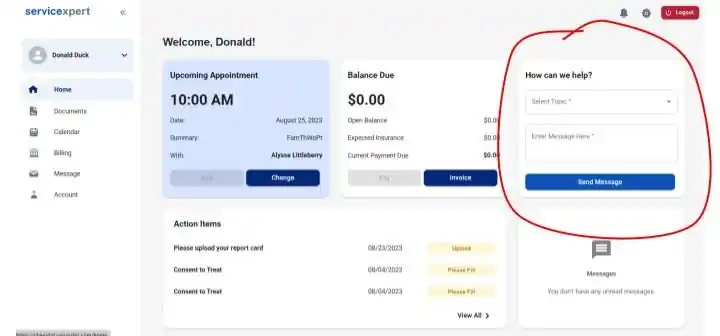
Here is your home screen when you login. From this screen you can access all patient functions. You can click on the menu items on the left to access more detail about each of the patient portal functions. Please see this video for a more detailed walkthrough of the patient portal.
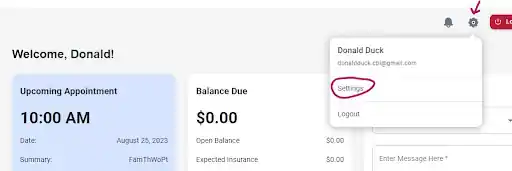
Once you have logged into your patient portal, click on the GEAR symbol in the upper right hand corner and select SETTINGS in the drop down box.
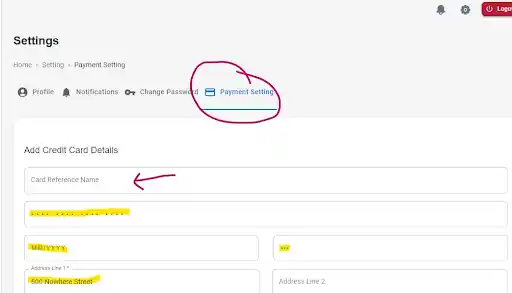
On the next page, select Payment Setting. Add credit card details will appear as seen below. You can choose to name your credit card for reference. Example: HSA Card, Donald’s Visa, etc. The highlighted portions are where you will enter your card information.
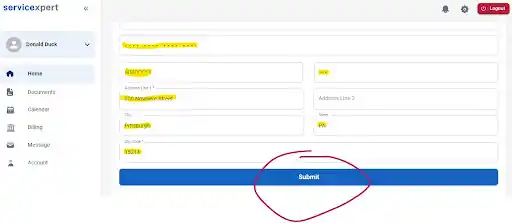
The last step is to click SUBMIT!
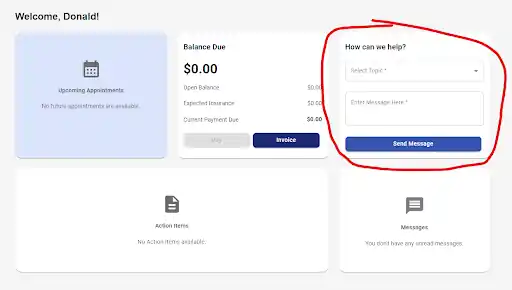
You can send a message quickly from the home page under the “how can we help” window on the right. Selecting the appropriate Topic from the dropdown will help make sure the message goes to the right recipient.
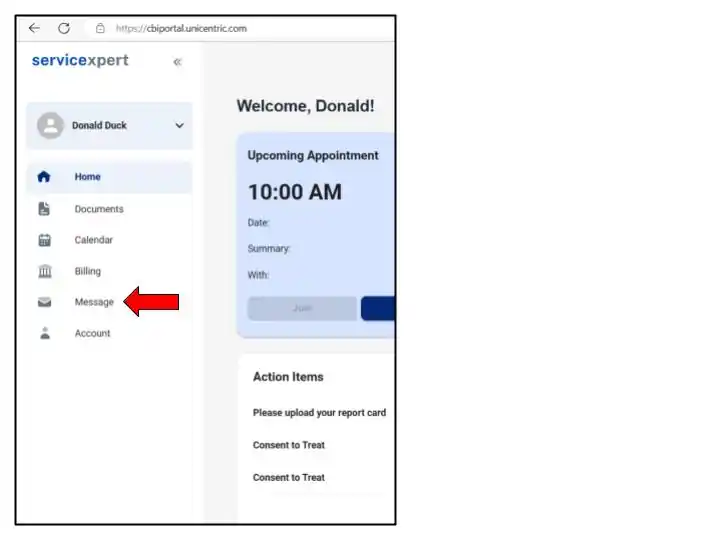
To view other threads and send a message from the message window, click message
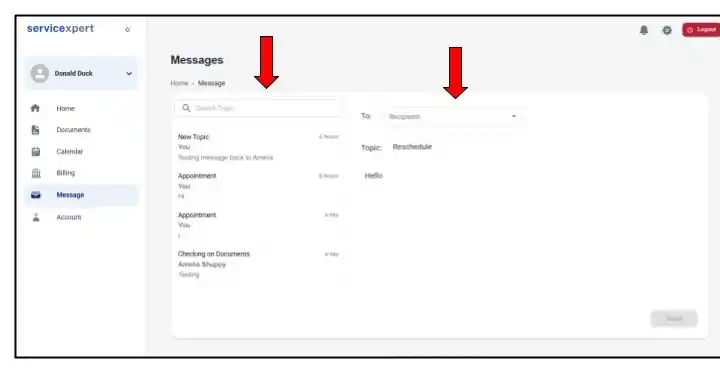
Type in a topic (subject) and select the recipient
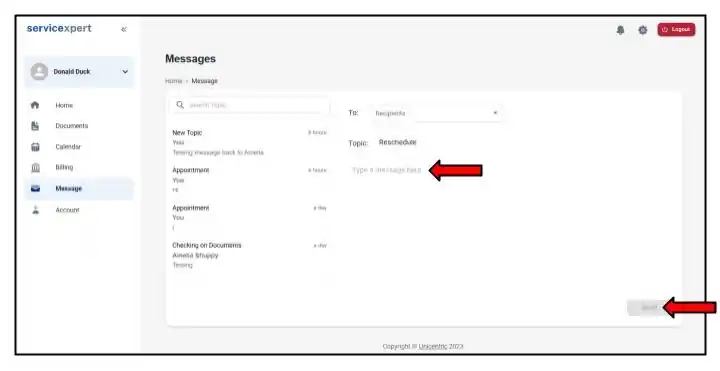
Type message and click send
You can manage what types of notifications and reminders you get for what through the patient portal.
Click the cog (the gear shaped symbol) in the top right corner
Click settings

Click Notifications
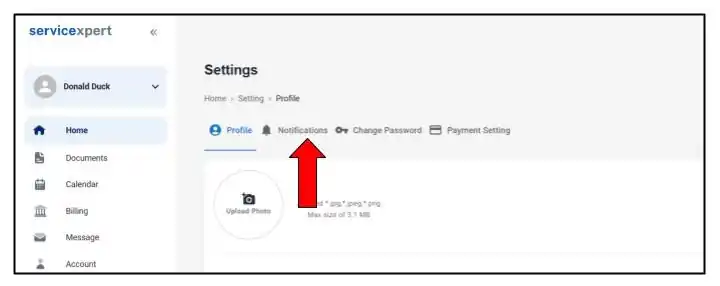
Check the boxes for what notifications you would like and which way you prefer to receive them (email or text) and click save.

Please note that you are still responsible for attending appointments, paying balances, and completing any assessments or assignments from CBI and your provider whether or not you get notifications.
You can access your virtual appointment directly when you log into your portal. On the portal homepage you’ll see a box with your upcoming appointment:
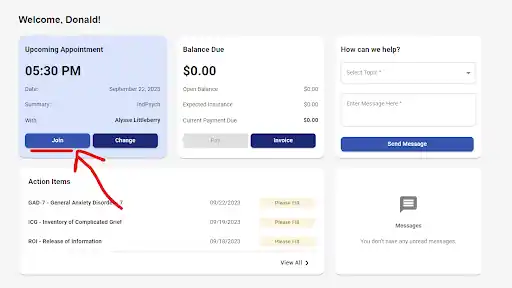
The button will turn dark blue indicating you are now in the window of time that you are allowed to join the virtual session. Click the “join” button on the bottom left-hand side of the box.
A pop up message will appear so you can confirm that you are physically located in a state that your provider is licensed to practice in. Click “Confirm” to be taken to the virtual waiting room.

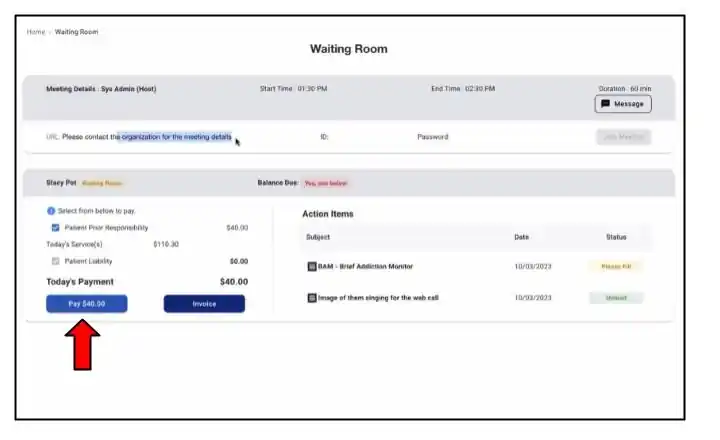
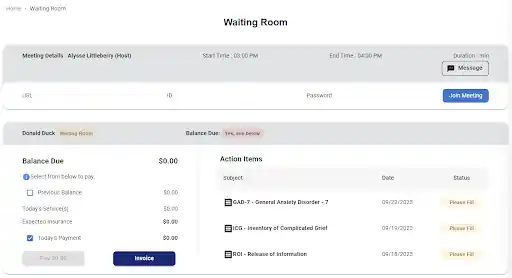
From here, you’ll be taken to a virtual waiting room for the appointment. Your provider will be able to see that you are in the waiting room ready for the appointment. In the waiting room, you are able to pay any balances you have due or complete any assessments or other documents thave have been requested. Please pay any copays or other payments prior to joining the session. You will not be admitted to the appointment with outstanding balances.
Once you have completed any needed tasks in the virtual waiting room, click “Join Meeting” on the top right to be taken to the telehealth session.
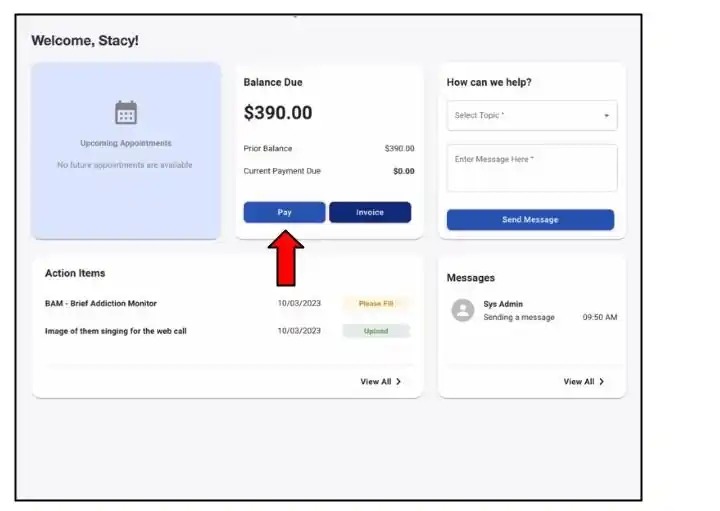
You can pay your balance in several ways.
The first way is right from your homescreen. Click pay.
You can also pay in the waiting room of your virtual appointment.

If your appointment is in person, you can pay with credit card, cash or a check. You can ask your provider or a member of our admin team if you need a receipt printed.
You will be able to see a list of any documents that need to be completed as soon as you sign into your portal under “Action Items”. Press the yellow button to the right in order to complete any items:

You can also see a full list of your assigned documents, tasks, or measures by clicking “View All”:

OR
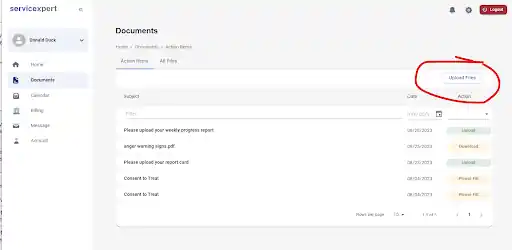
You can also view your full list of documents by selecting “Documents” from the menu on the left-hand side and then selecting “All Files”. This allows you to see any files that you have previously completed:

If you need to upload something else for your provider or our team to see, you can click the “Upload Files” button on the top right of the documents list.
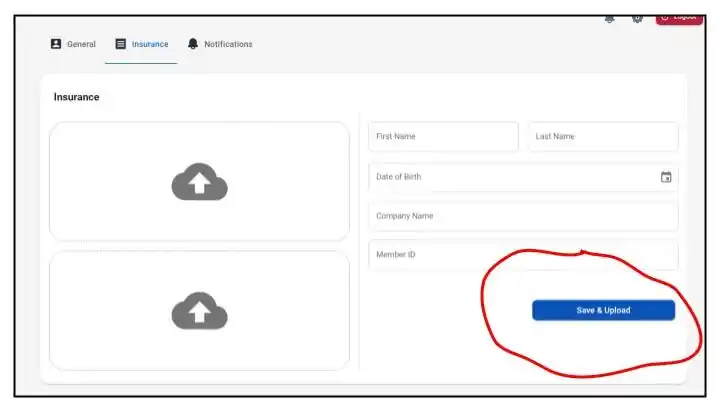
Click account from your home page

Click insurance

Enter your new information and upload the picture of your insurance card and click “save and upload.” Please also upload an image of the front and back of your insurance card.
If you need a refill on your medication, please log into the patient portal. On the main page of the portal where you first log in, please select “Medication Refill Request” under message topics and note which medication you need a refill of along with any other relevant information. Our team will review the rest from there. Please review your prescriber’s guidelines for any other pertinent information regarding medication refills.
Communication between medical providers can sometimes be necessary for best care practices. A Release of Information form gives the organization (such as your PCP, hospital, specialist…) authority to release a specific portion of your medical record or communicate in other ways about your care.
For example, if you give permission for your PCP to receive information from your medical record at Cognitive Behavior Institute, you would have to sign a Release of Information stating CBI can send portions of your CBI records to the PCP and vice versa.
When there is a release of information for you to sign, it will appear in your portal under action items:

From your home page find action items and click on please fill as seen above.
After you click please fill, the release of information will open like this:

If you have any questions, feel free to message our staff using the messaging functionality in the portal, or email us at staff@cbipsychotherapy.org or call us at 724-609-5002.